Get started · Guide
Issue your first certificate
This guide takes you from a new account to a verified certificate in your recipient's inbox. It takes about ten minutes. Watch the video, or follow the steps below.
1. Create your account
- Go to Get started (top right of every page).
- Fill in a username, your work email, your organisation's name and type, and a password.
- Tick the box to accept the terms, then click Sign Up.
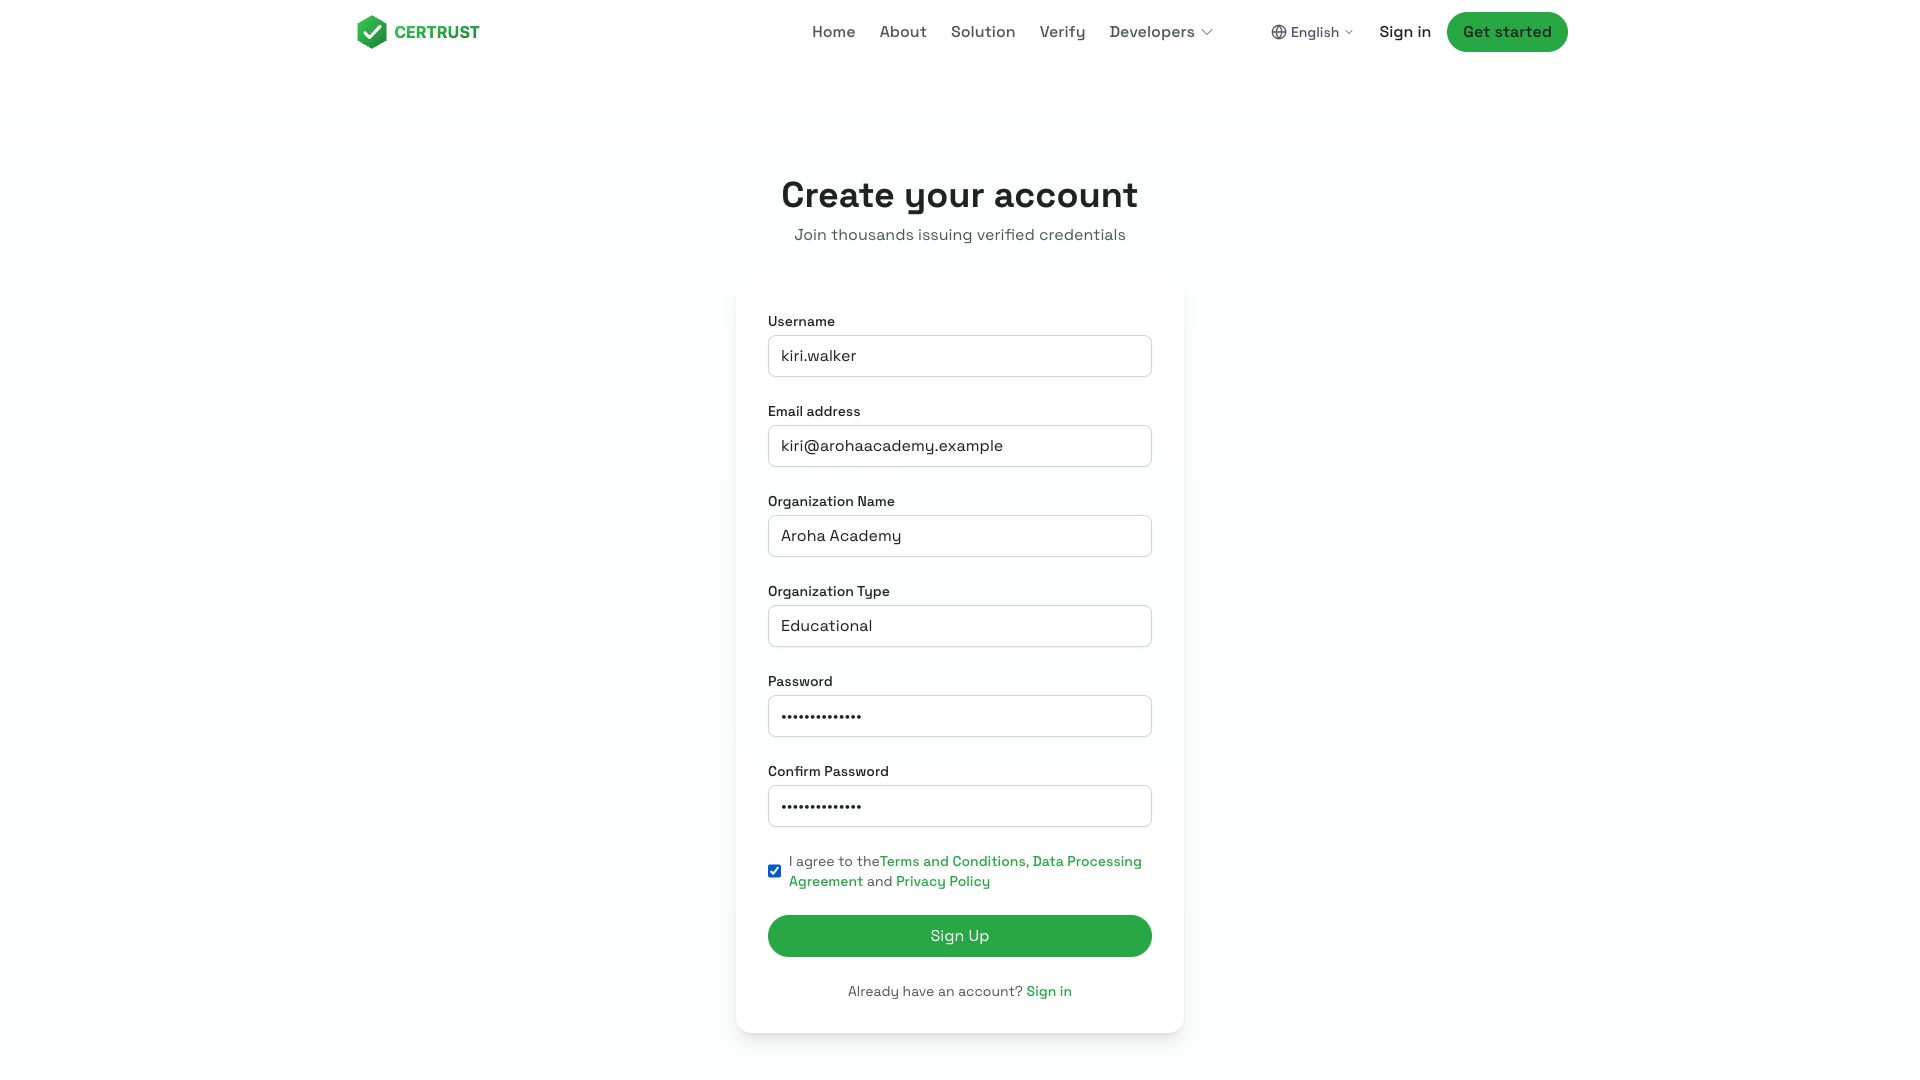
Your organisation name is printed on every certificate and in every email you send, so use the name your recipients know you by.
2. Confirm your email and sign in
- Open the email from Certrust and click the confirmation link.
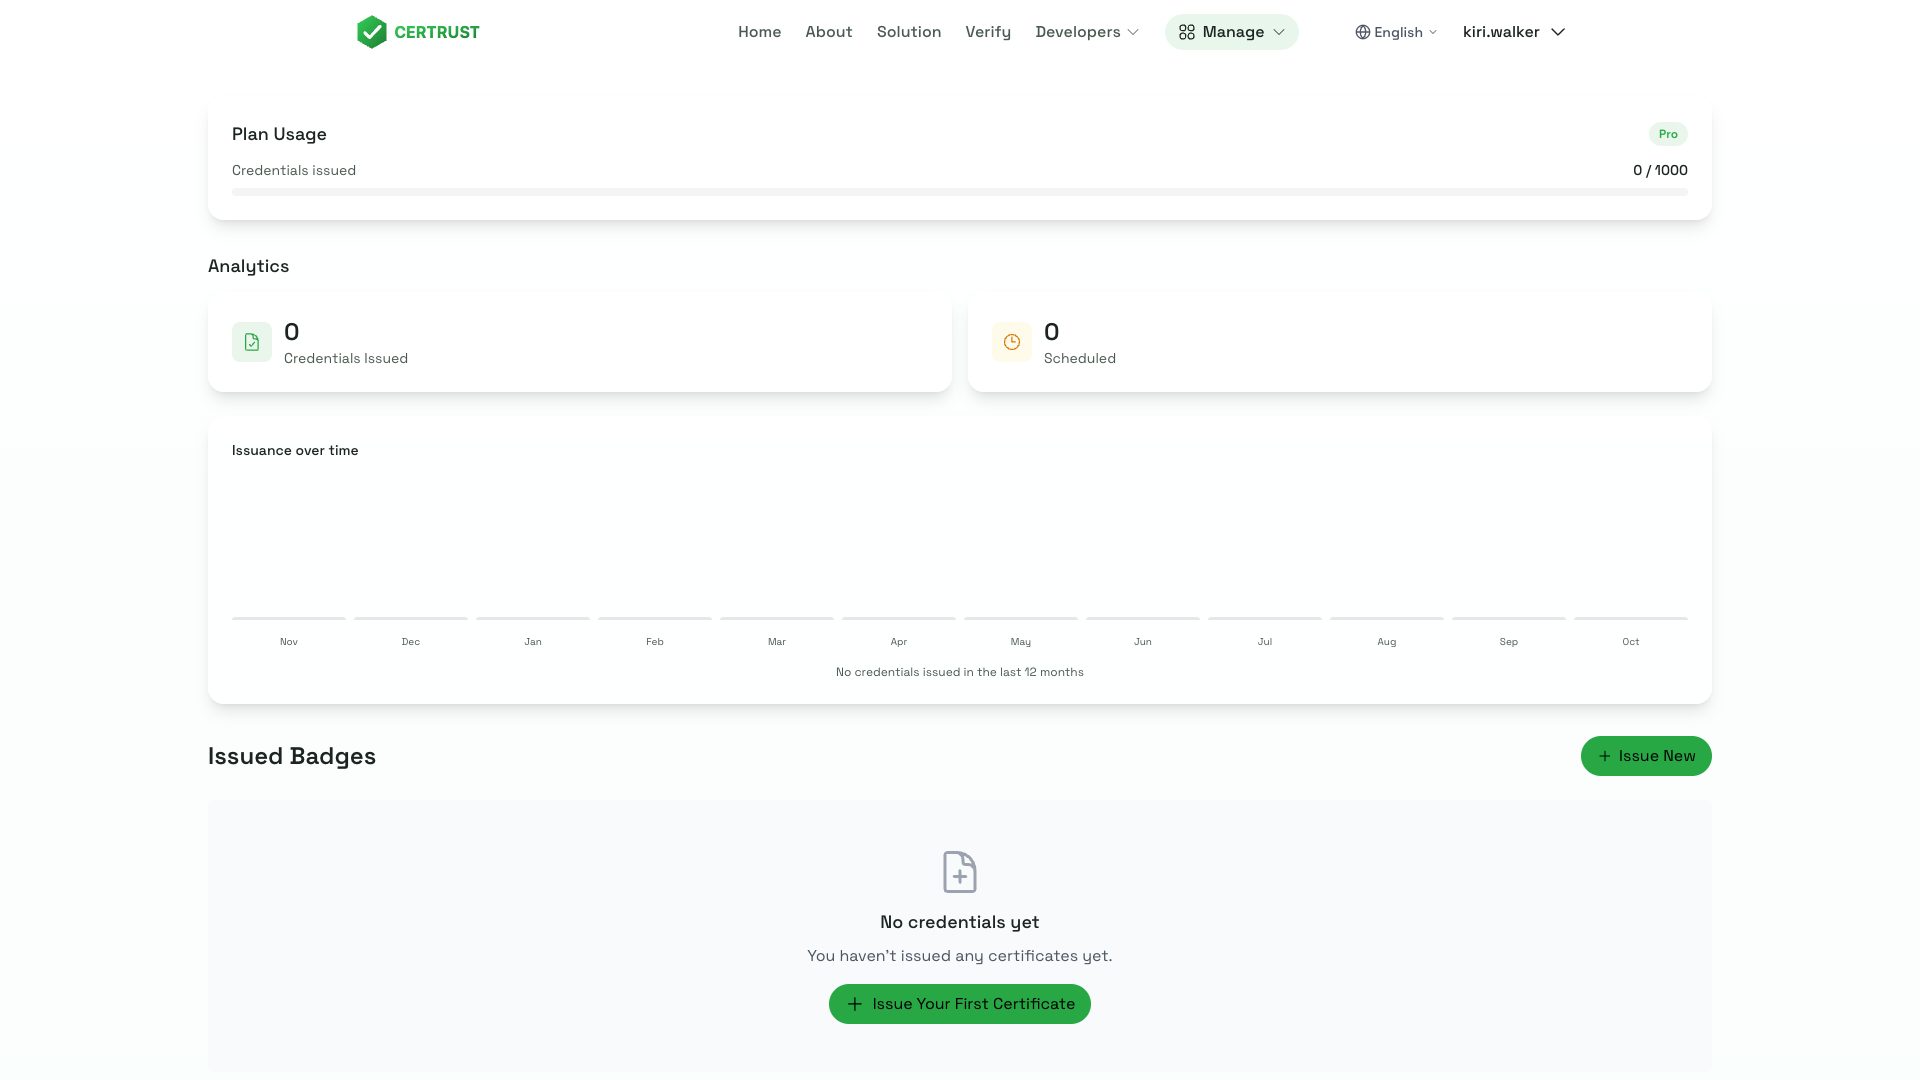
- Sign in with your email and password. You land on your dashboard.
3. Design your certificate
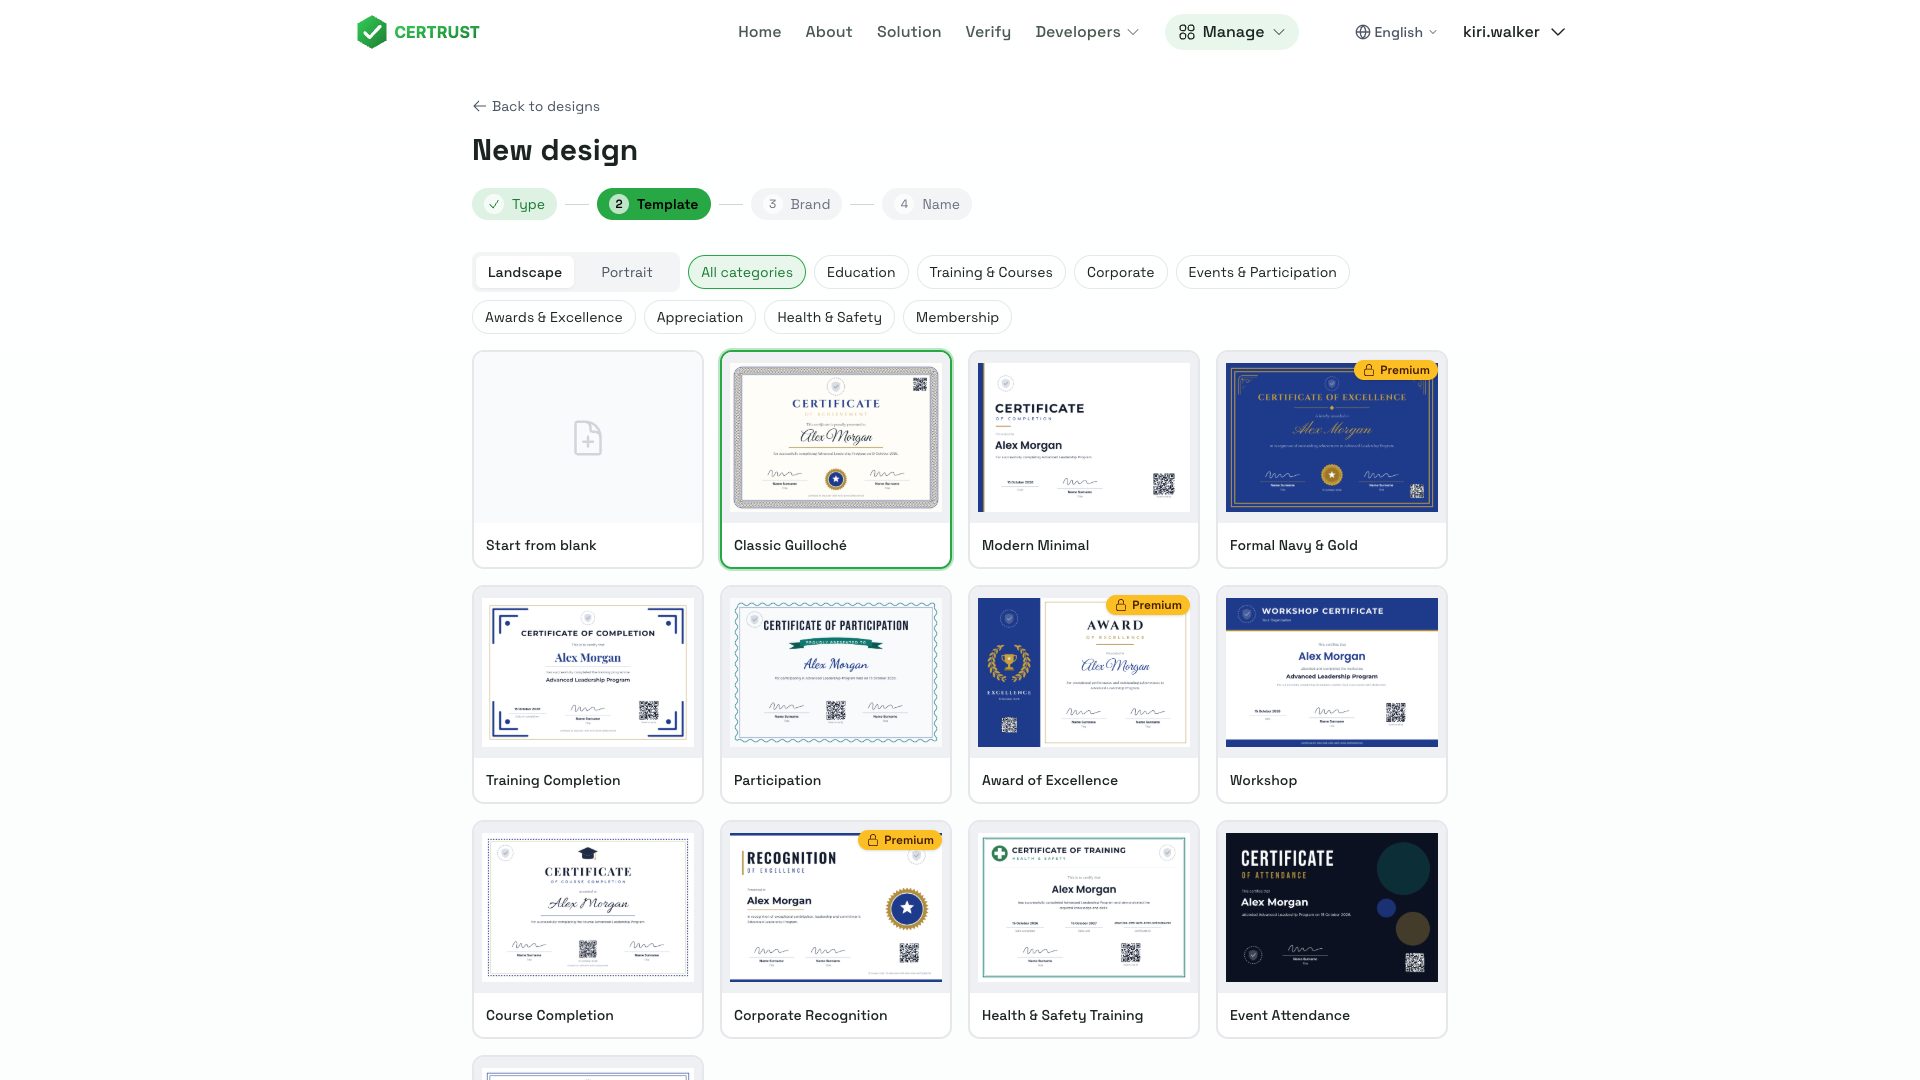
- Open Manage → Design Templates and click New design.
- Choose Certificate (or Badge), then pick a layout from the library. Templates marked Premium need a paid plan.
- Add your logo and colours on the Brand step, or skip it for now. Give the design a name and click Create.
The Design Studio opens. Change anything you like:
- Click a piece of text on the page, or in the Layers panel, and type the new wording in the Text box on the right. Signature names and job titles are a good place to start.
- Add text, images and QR codes from the panels on the left. Drag things to move them.
- Words in square brackets, such as
[recipient.name], are filled in for each person when you issue. Tick Sample data to preview them.
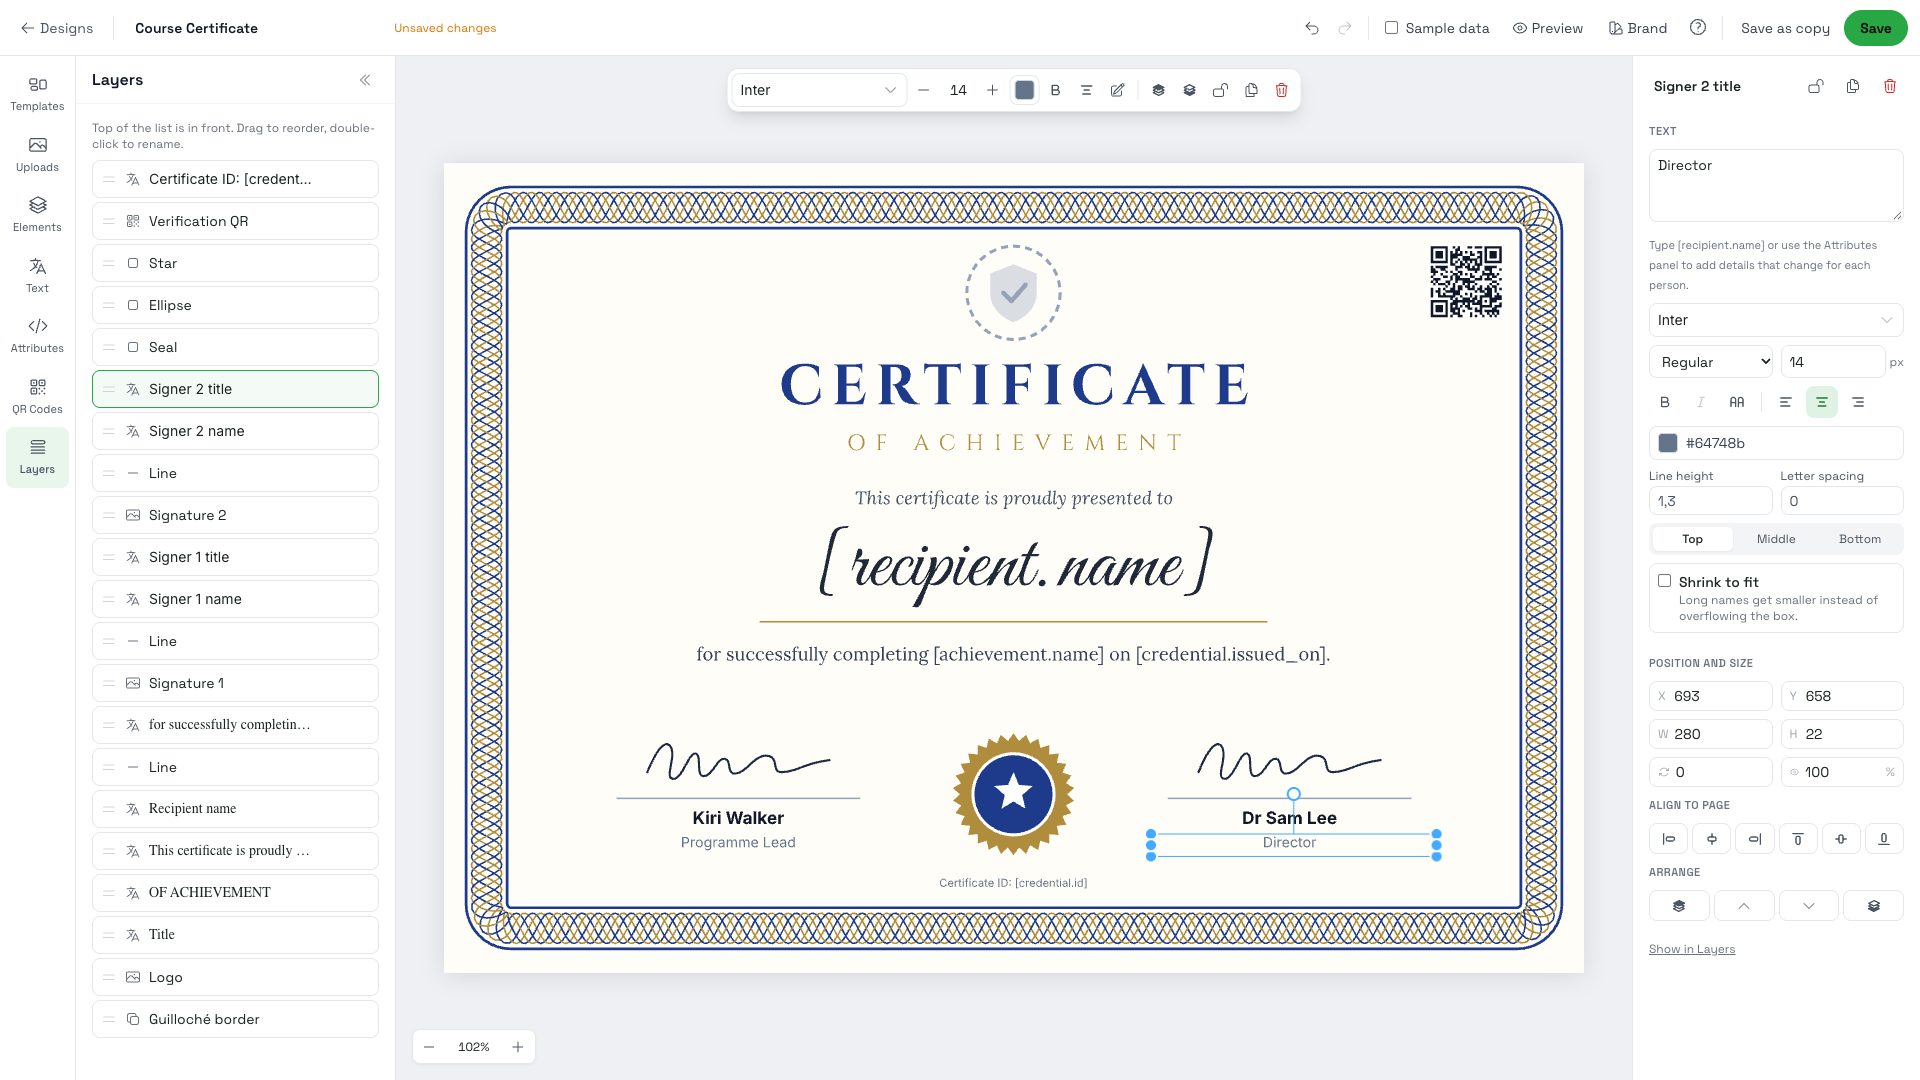
Click Save when you are done.
4. Create an achievement
An achievement is what you are awarding: a course, a workshop, a qualification. You create it once and issue it to as many people as you like.
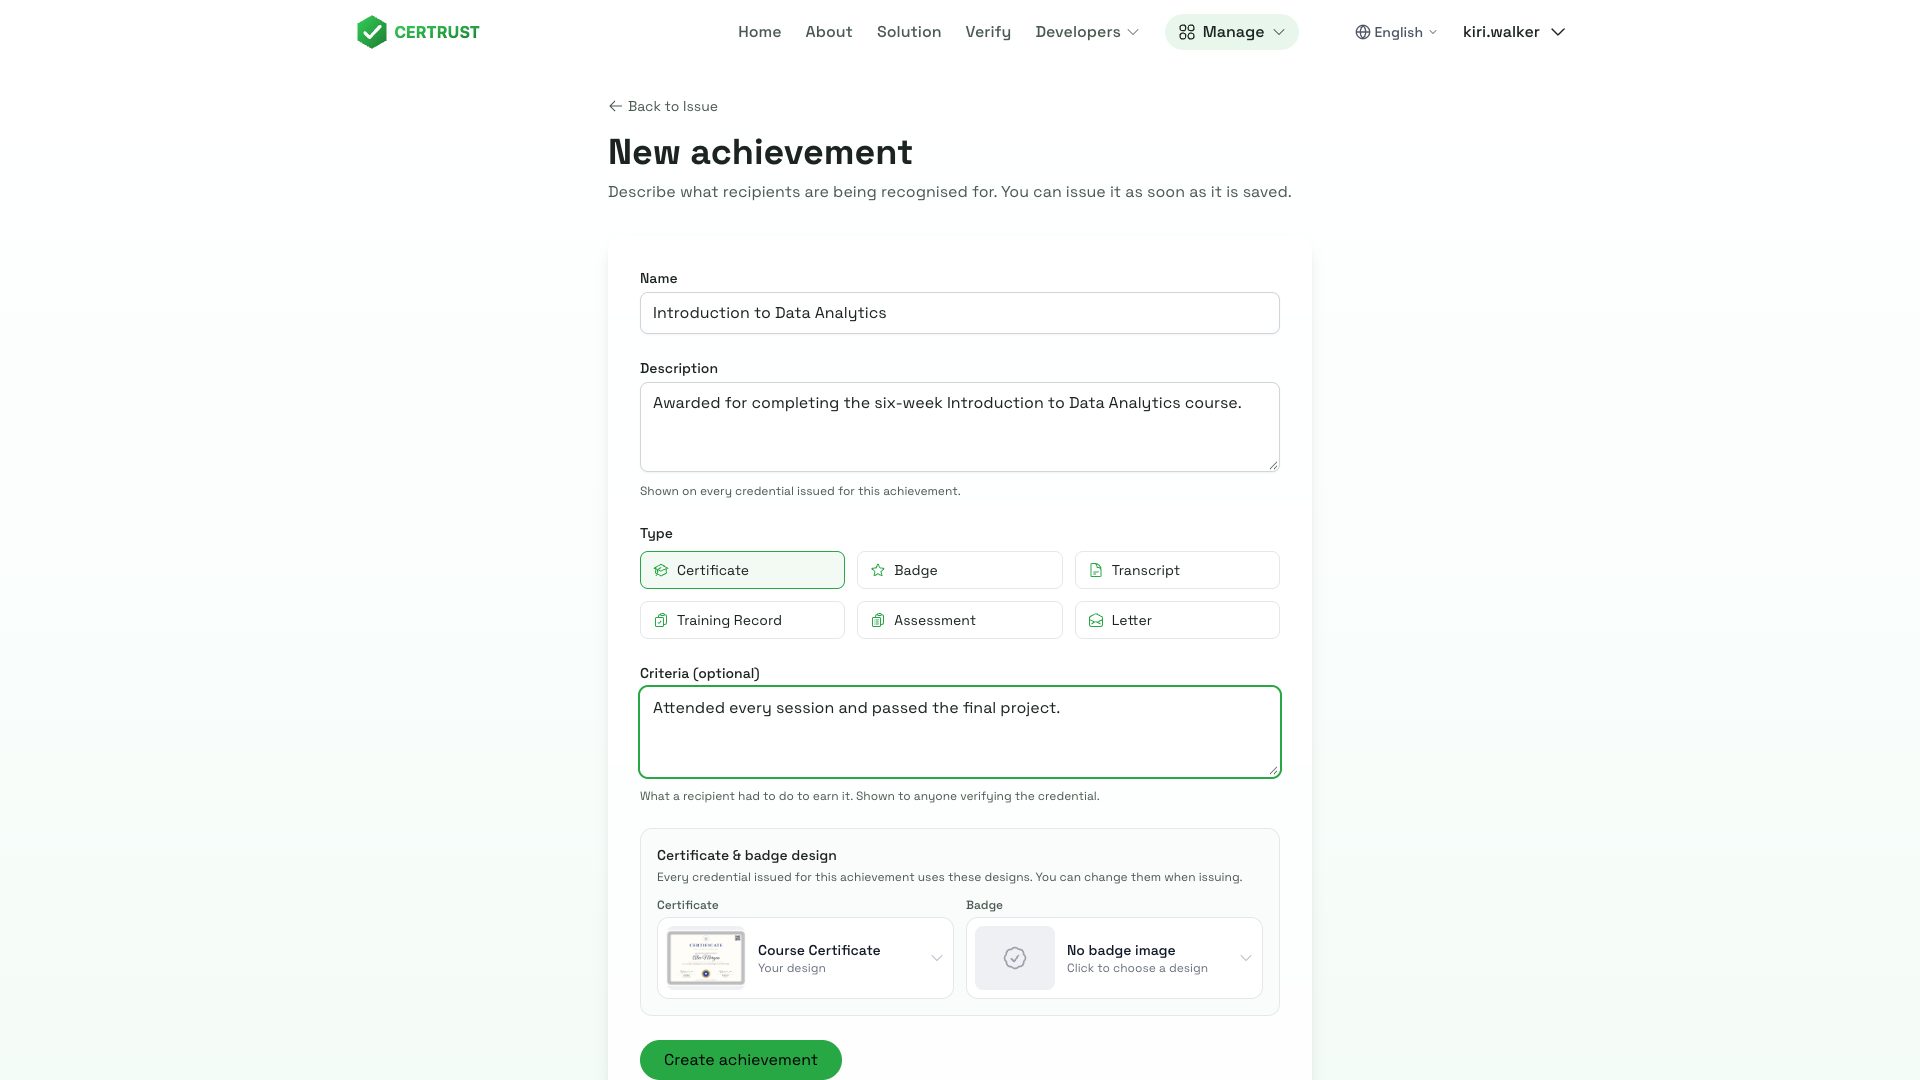
- Open Manage → Issue Badges and click New achievement.
- Enter a name and a short description. Both appear on every certificate.
- Choose the type, and optionally the criteria: what someone had to do to earn it.
- Your newest certificate design is already selected. Change it here if you need to, then click Create achievement.
5. Issue to your recipients
You are taken back to Issue with your new achievement selected. Add the people to award it to, either way:
- One at a time: type a name and email address.
- Many at once: click Upload CSV. A CSV is a spreadsheet saved as "CSV" from Excel or Google Sheets, with a
nameand anemailcolumn. Use the CSV template link to start from one that is already set up.
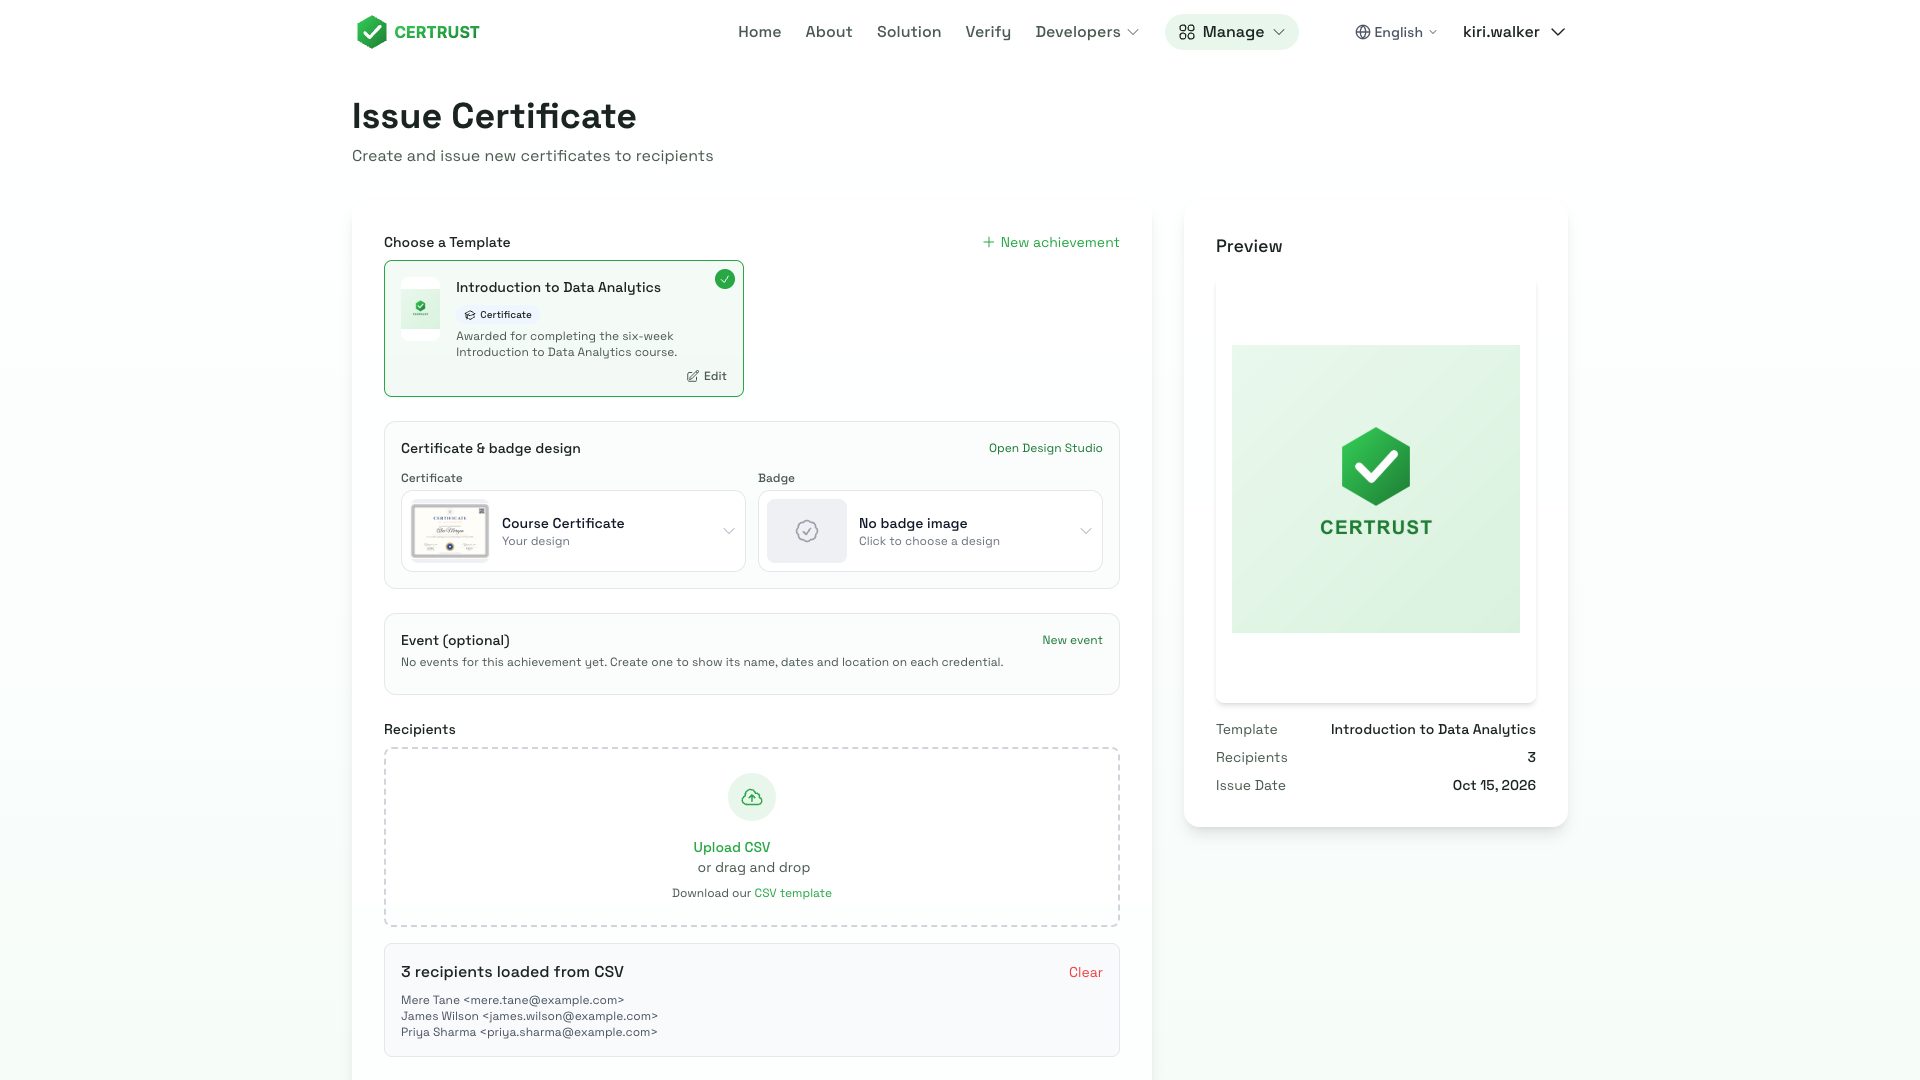
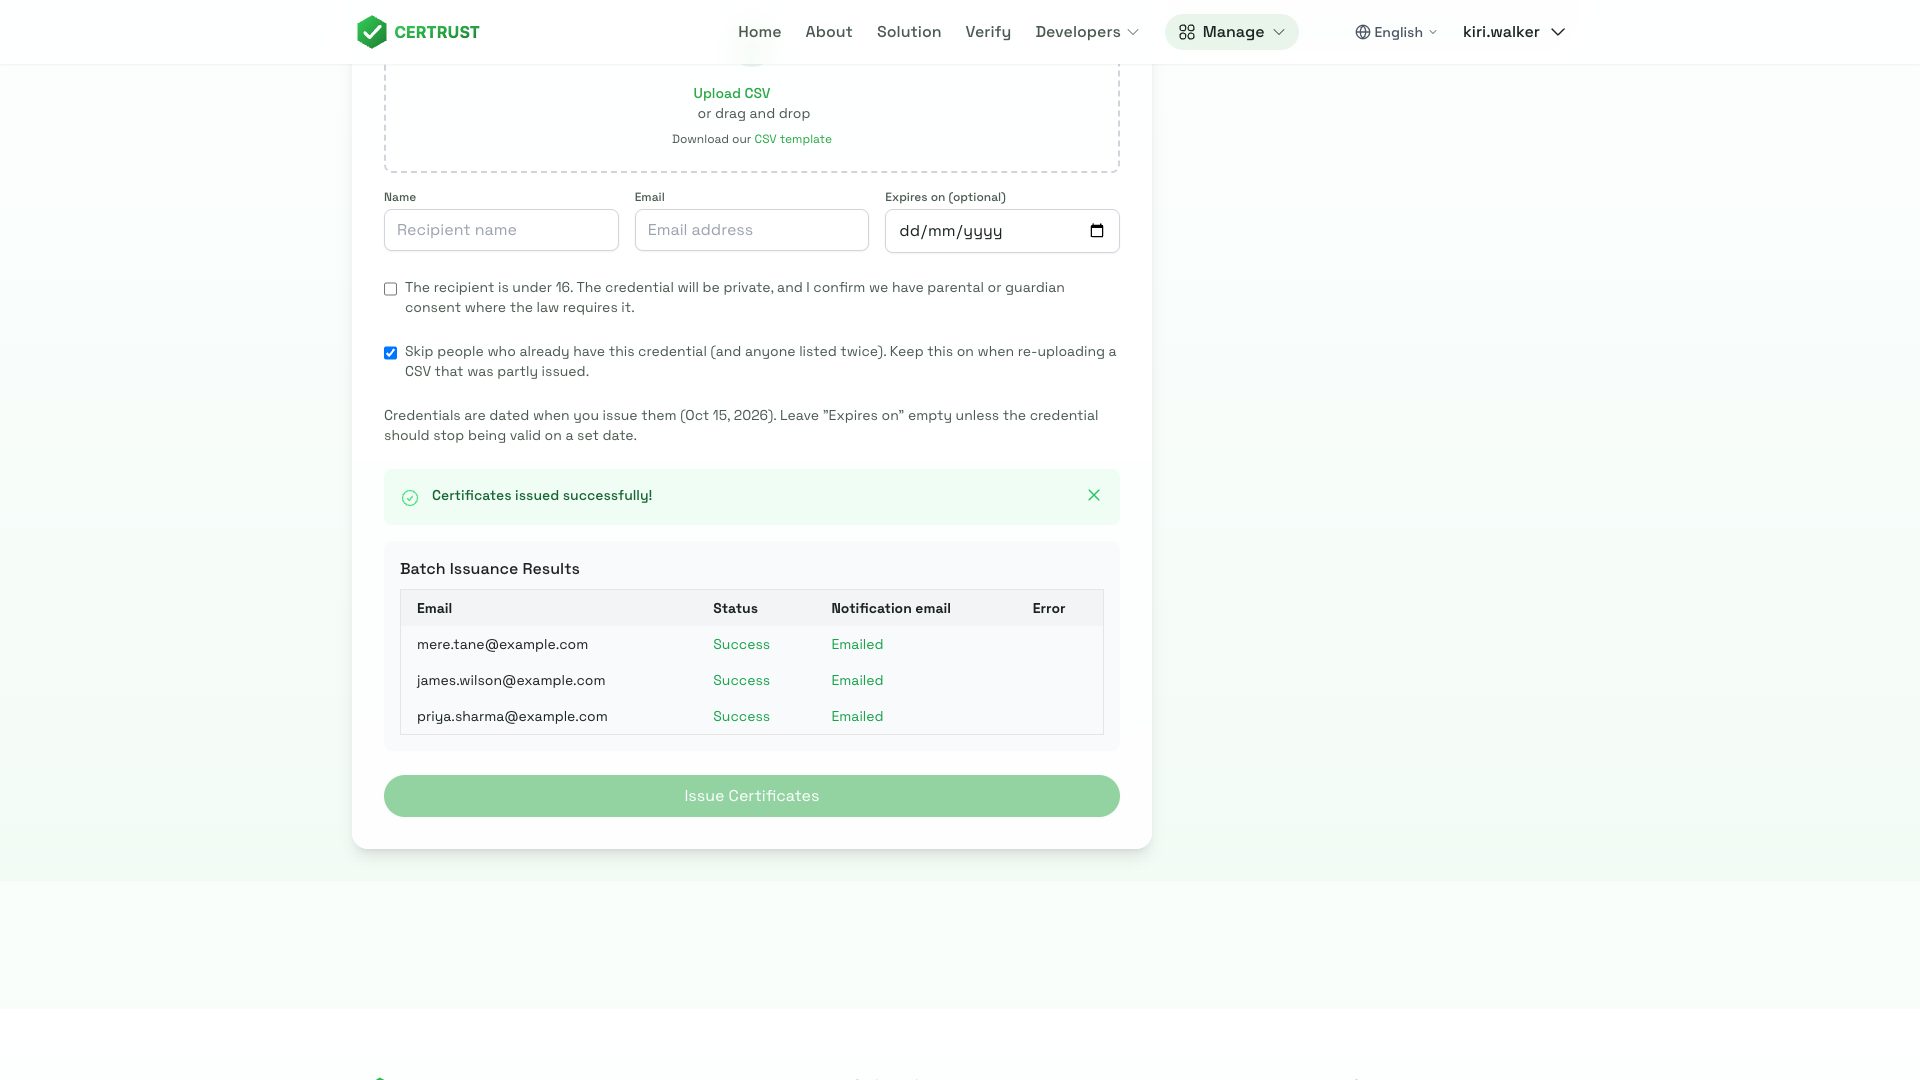
Check the list and click Issue Certificates. The results table shows each person, and whether their email was sent.
6. Your recipients get an email
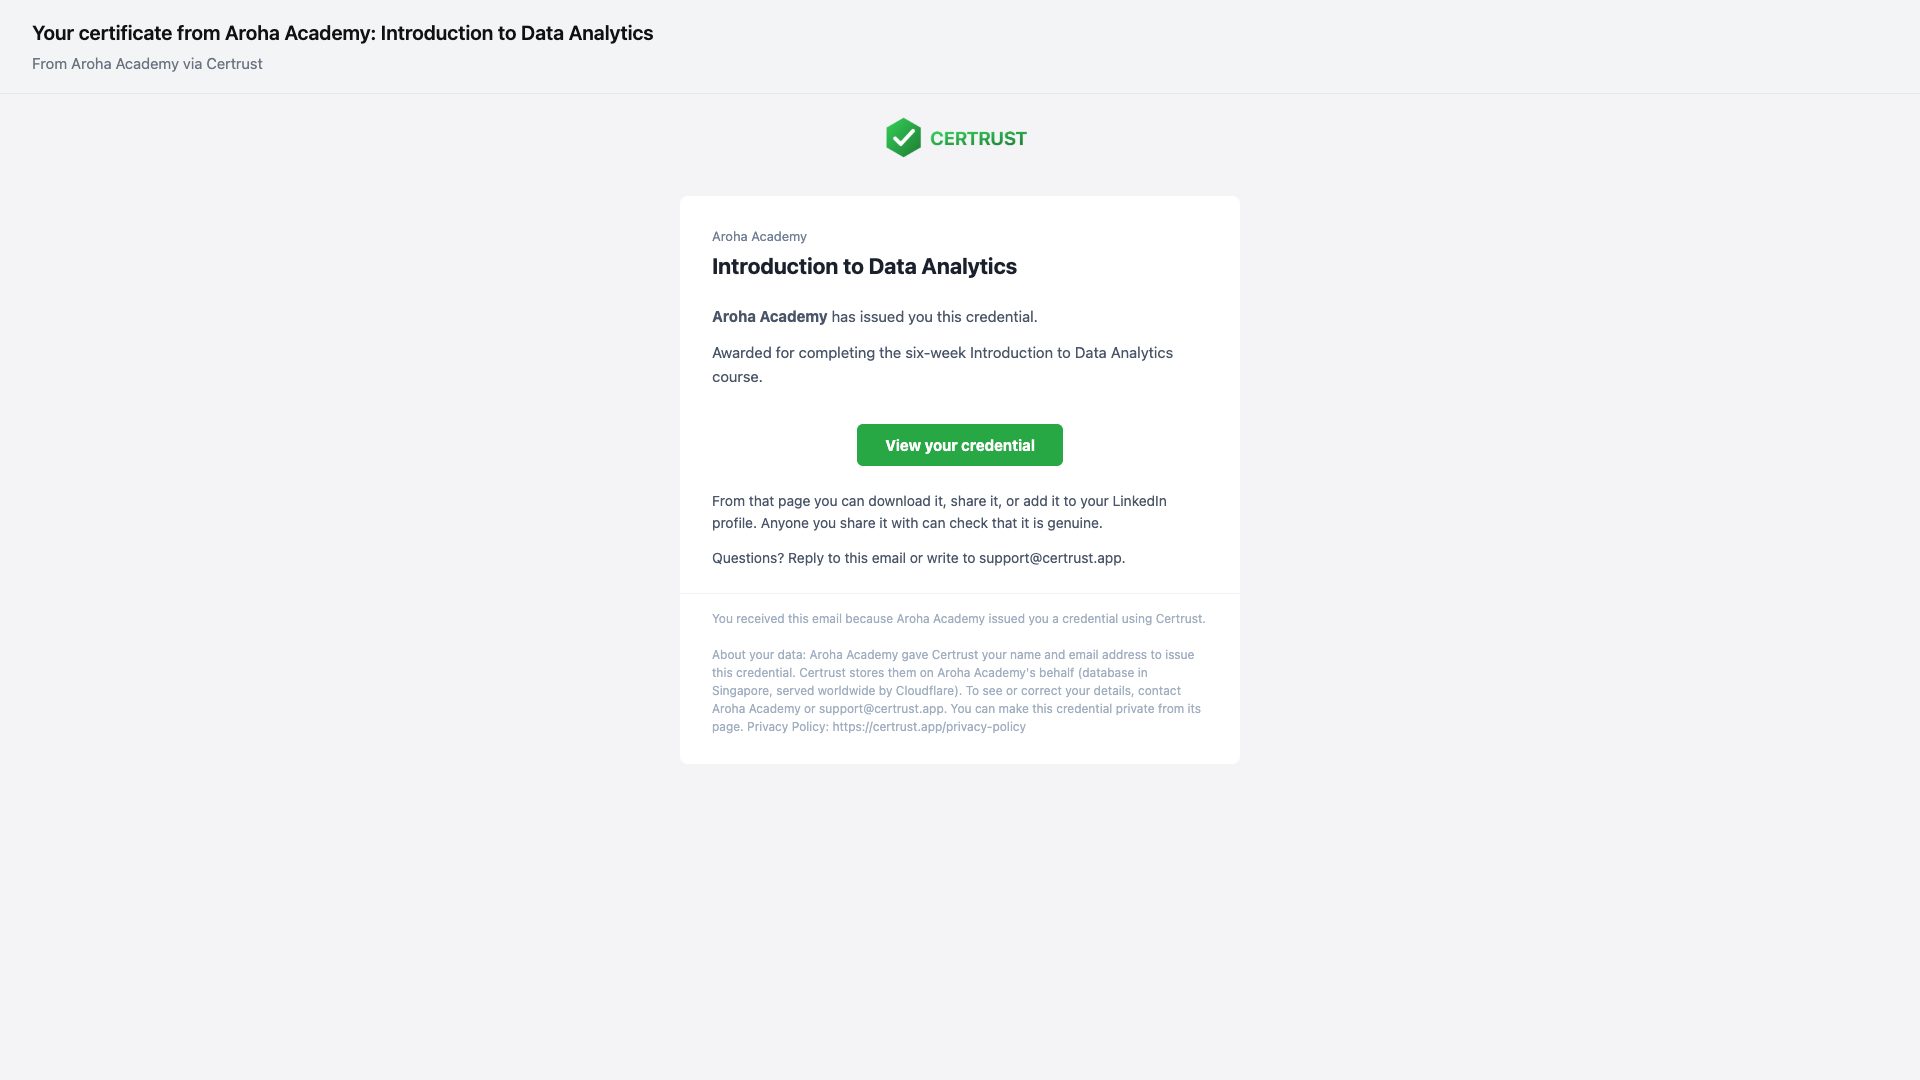
Each person receives an email from your organisation with a View your credential button. They do not need an account or anything installed.
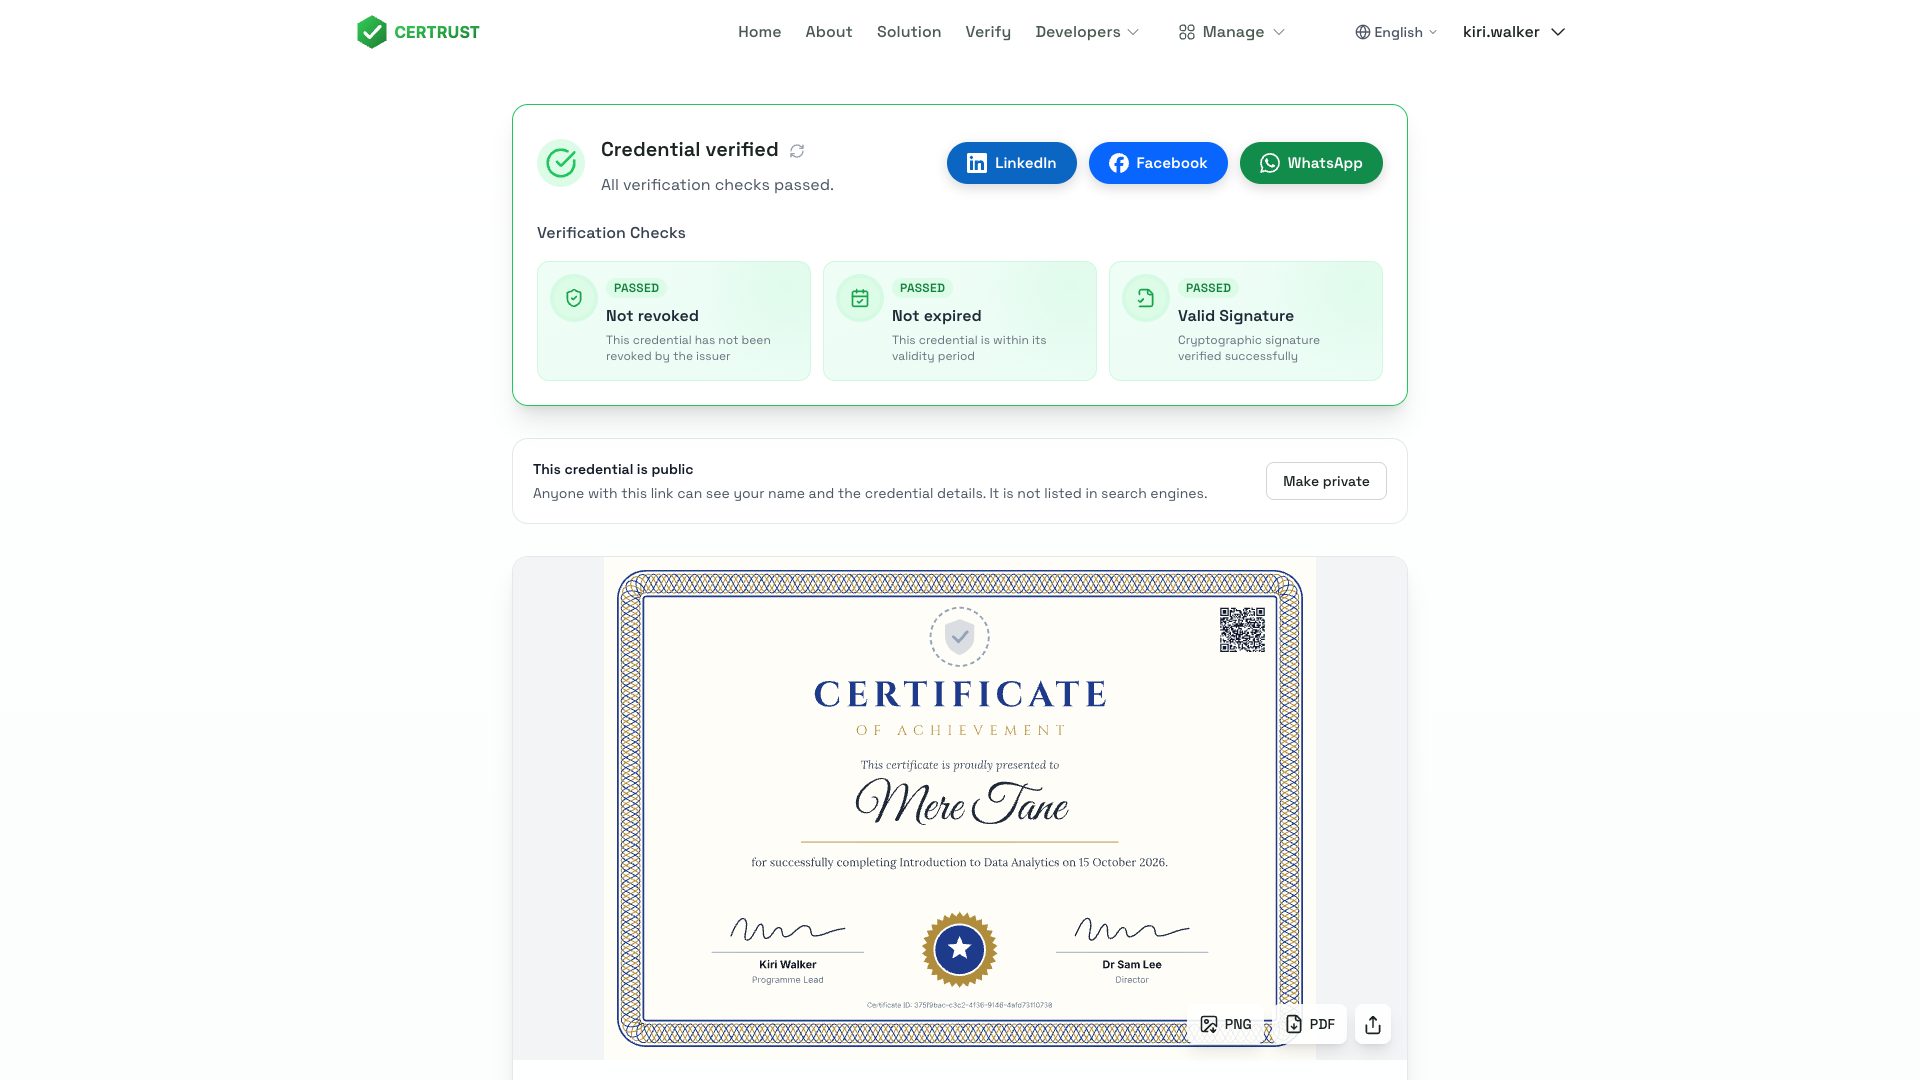
7. The verified certificate
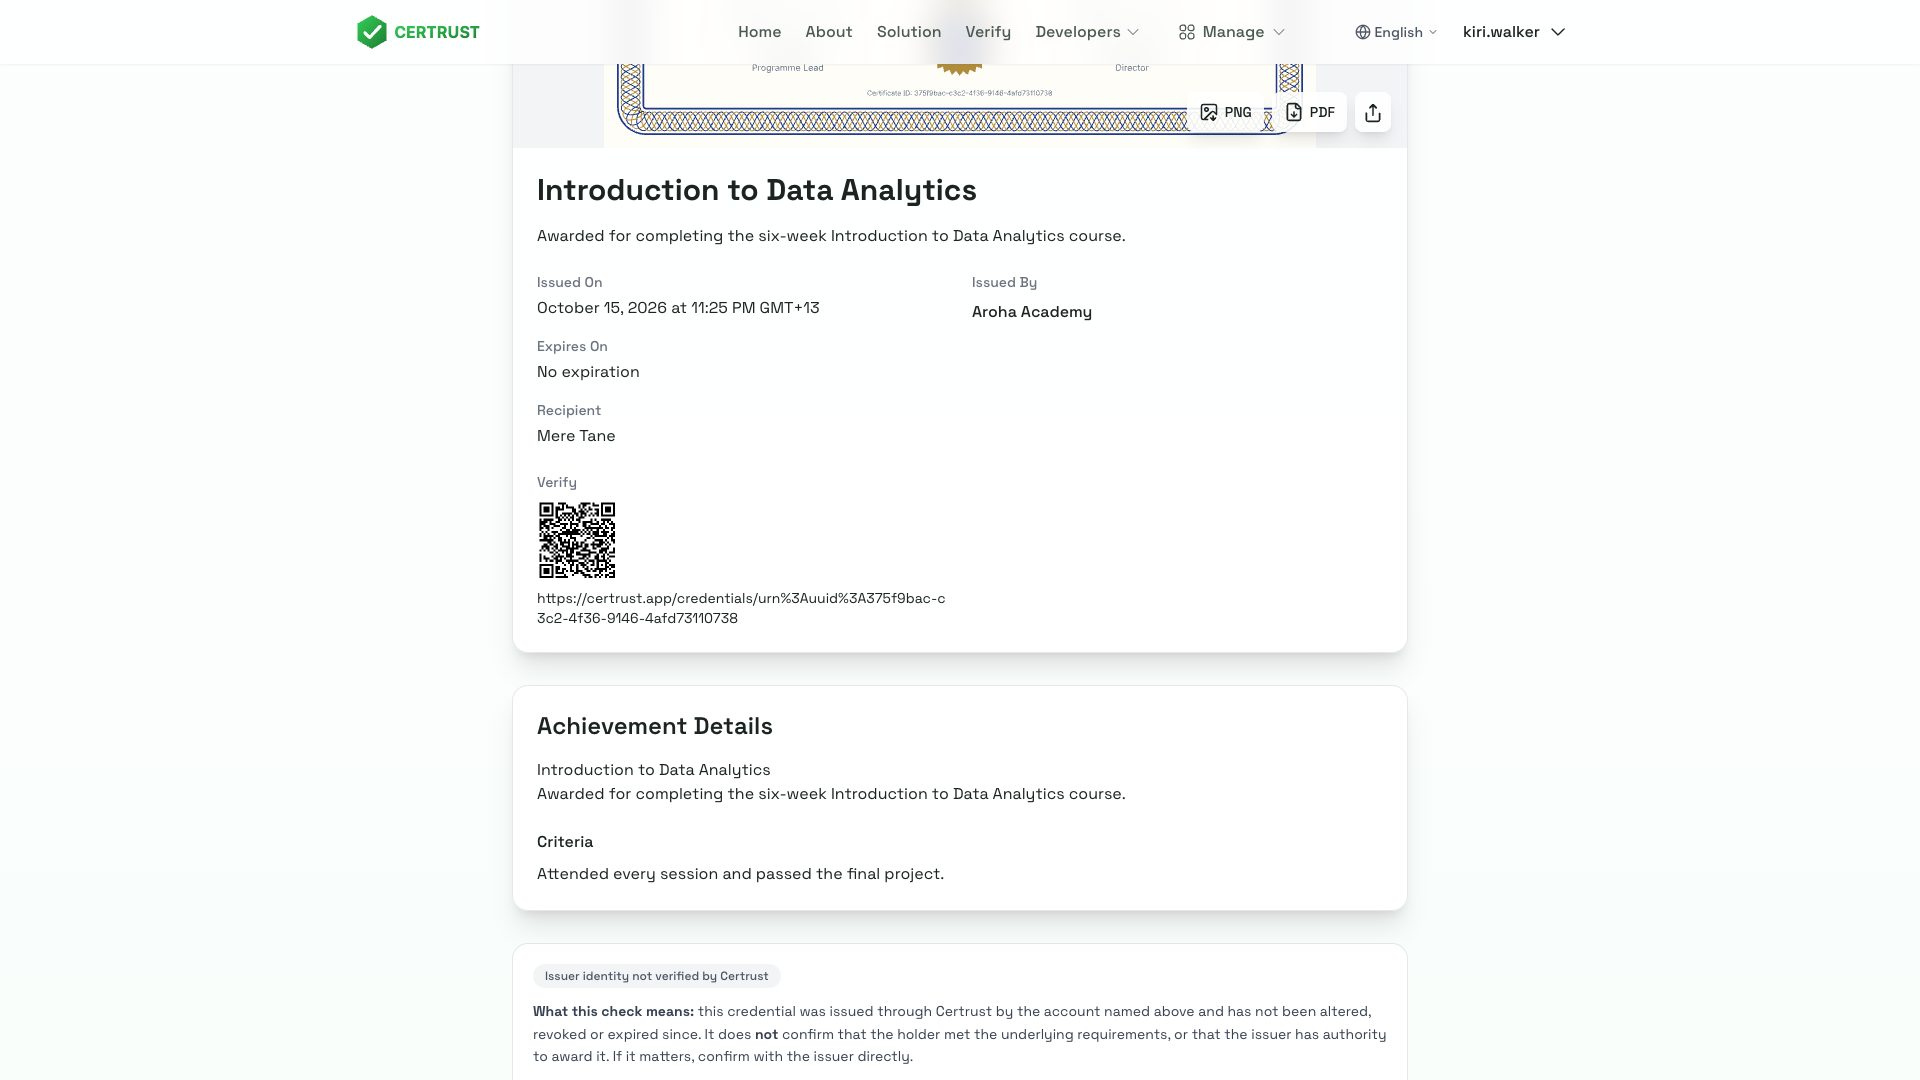
The button opens the certificate page. Certrust checks the certificate every time someone opens it:
- Valid signature: it was issued by your organisation and has not been changed.
- Not revoked and not expired.
8. Sharing and downloading
From the certificate page, your recipient can:
- add it to their LinkedIn profile in one click, or share it on Facebook or WhatsApp;
- download it as a PNG image or a PDF;
- share the link or the QR code. Anyone who opens it sees the same verification.
9. Your dashboard
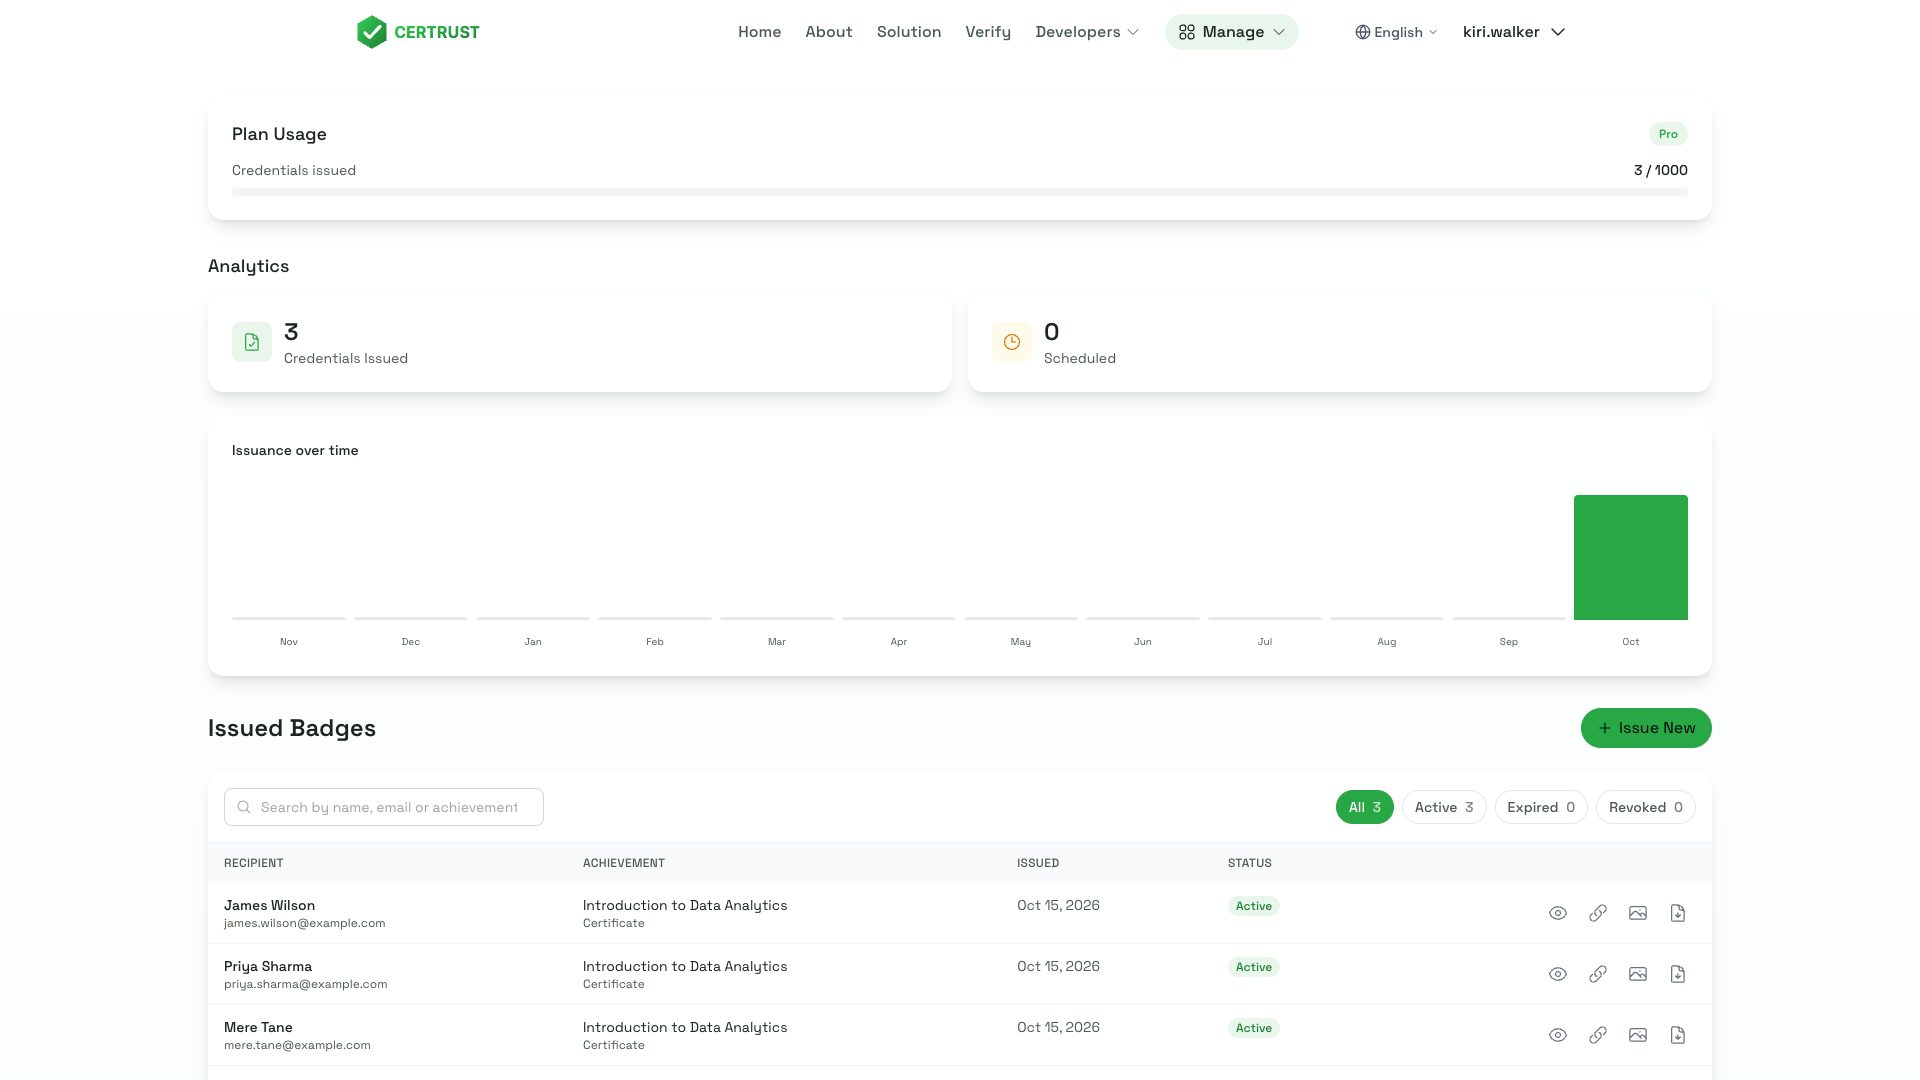
Your dashboard lists every certificate you have issued. Search by name, email or achievement, filter by status, and open, copy the link to, or download any certificate.
Next steps
- Issuing straight from a spreadsheet or a sign-up form? See Google Sheets and Google Forms .
- Running a course or event? Create an Event on the Issue page, and its name, dates and location are shown on each certificate page.
- Questions? Write to support@certrust.app.